

There’s nothing fairly like the joy of a brand new console; feverishly whipping off the packaging, organising your consumer account, and loading up your video games to settle in for an hours-long induction to your new system.
Thrilling although the method could also be, there is a basic step all too typically skipped: adjusting your settings. From Show and Audio settings to Person, Lock, and software program settings, there’s loads to tweak in your Swap 2.
I’ve spent per week with the console, and there are some must-change settings it’s best to regulate earlier than getting began; listed here are my suggestions.
1. HDR settings
Nintendo’s newest console helps HDR, and you’ll simply toggle this on and off inside the settings. Merely head to Settings > Show > HDR Output and ensure this setting is on by default.
Don’t cease there, although, as a result of there’s a second setting which lets you select which video games it’s enabled for. Scroll down within the Show menu, and you will see (confusingly) one other HDR Output possibility. Choose this, and you’ll select between ‘At all times Enabled’, ‘Suitable Software program Solely’, and ‘Disabled’.
I’d advocate switching it on for suitable video games as an alternative of the default always-on setting to verify non-compatible video games look pretty much as good as ever.
2. Protect the battery life
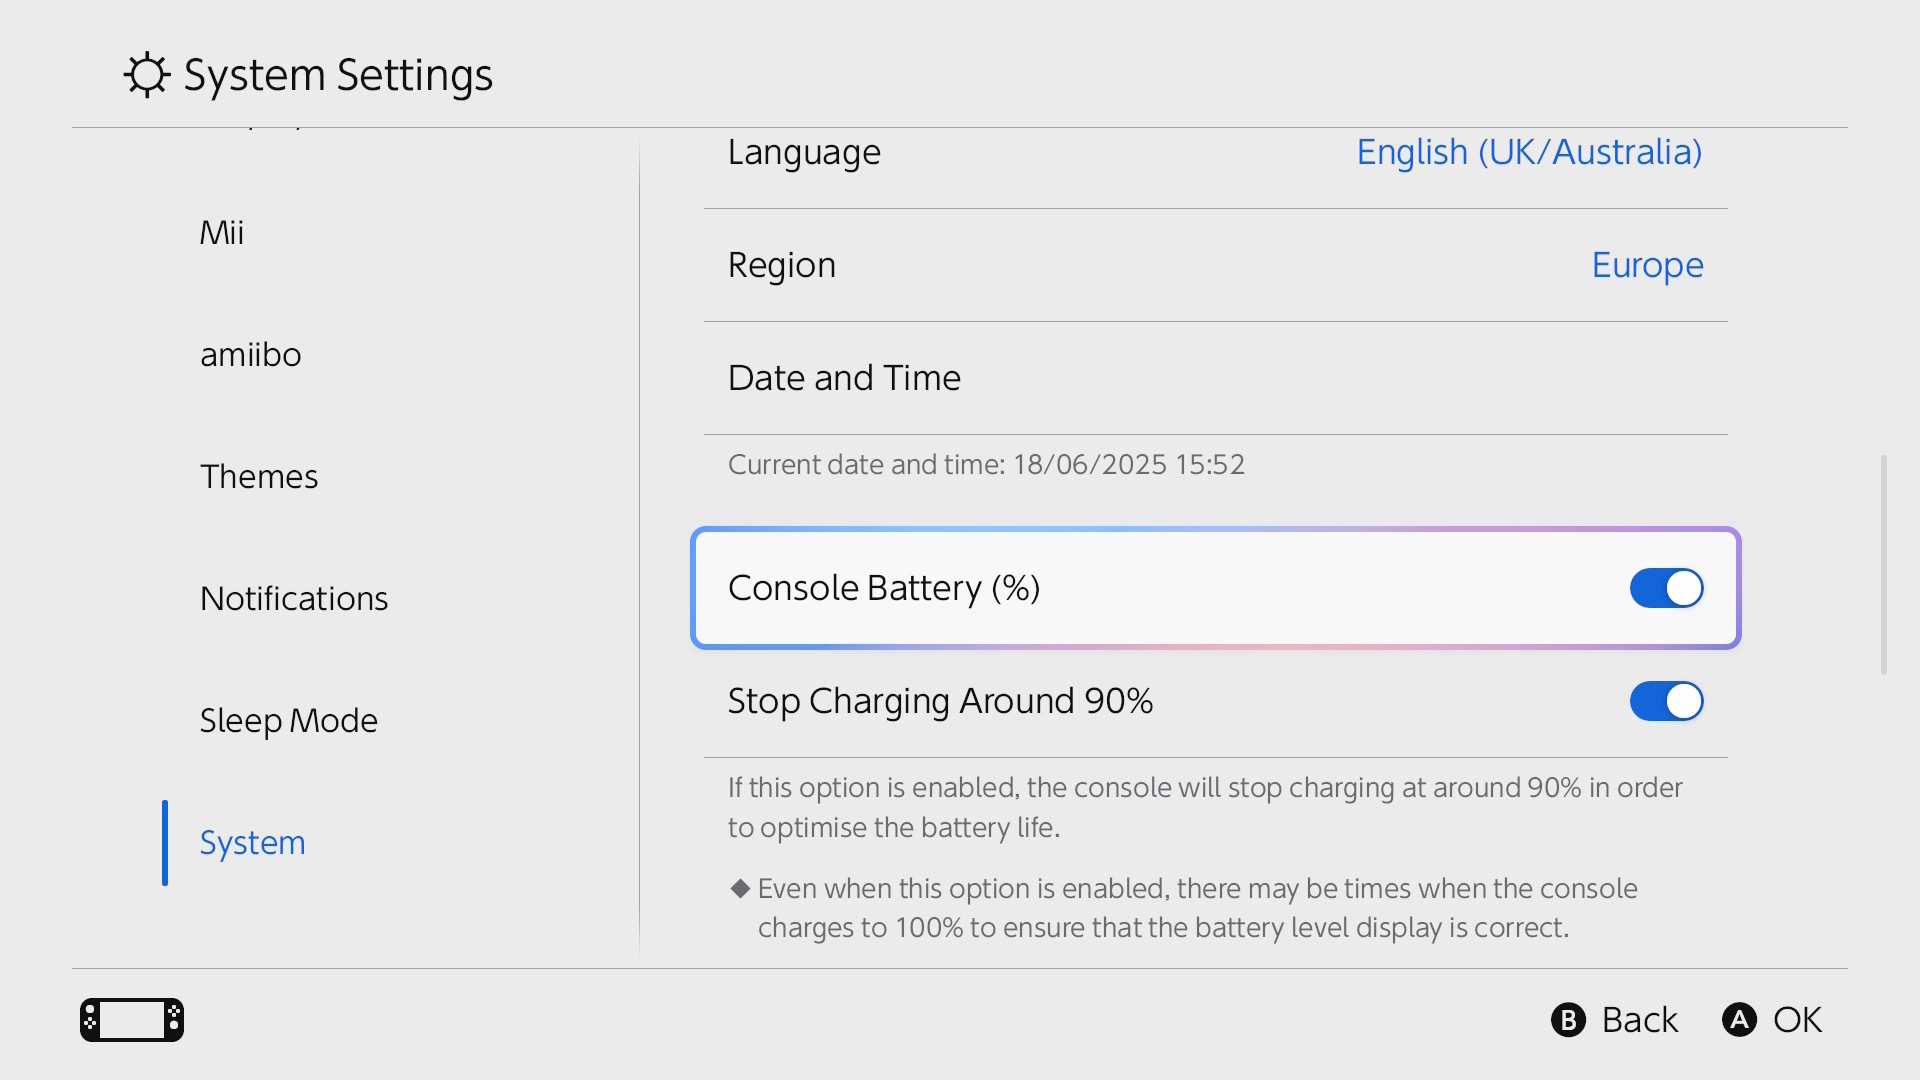
Should you’ve suffered from battery degradation in your first-generation Nintendo Swap, you’ll be delighted to know that the Swap 2 gives a setting that caps your battery life at round 90 % whereas it is on cost, which ought to assist your battery long-term. Merely head to Settings > System > Cease Charging Round 90%.
You’ll be able to simply toggle this on and off any time, so if you would like a full cost once in a while for an extended day of gaming in handheld mode, it’s only a matter of a fast journey to the settings. Alternatively, you possibly can merely outsource the load and check out a conveyable battery in your Nintendo Swap 2.
3. TV decision

Players, rejoice – the Nintendo Swap 2 can help display resolutions as much as 4K, albeit at a 60Hz refresh charge and 60fps for many titles, however you may need completely different concepts in your new console. Once more, head to Settings > Show > TV Decision.
Inside the settings, you possibly can toggle computerized decision detection or manually set the decision in your TV, particularly useful in the event you would like the upper refresh charges obtainable in 1440p or 1080p resolutions.
4. Change your lock settings
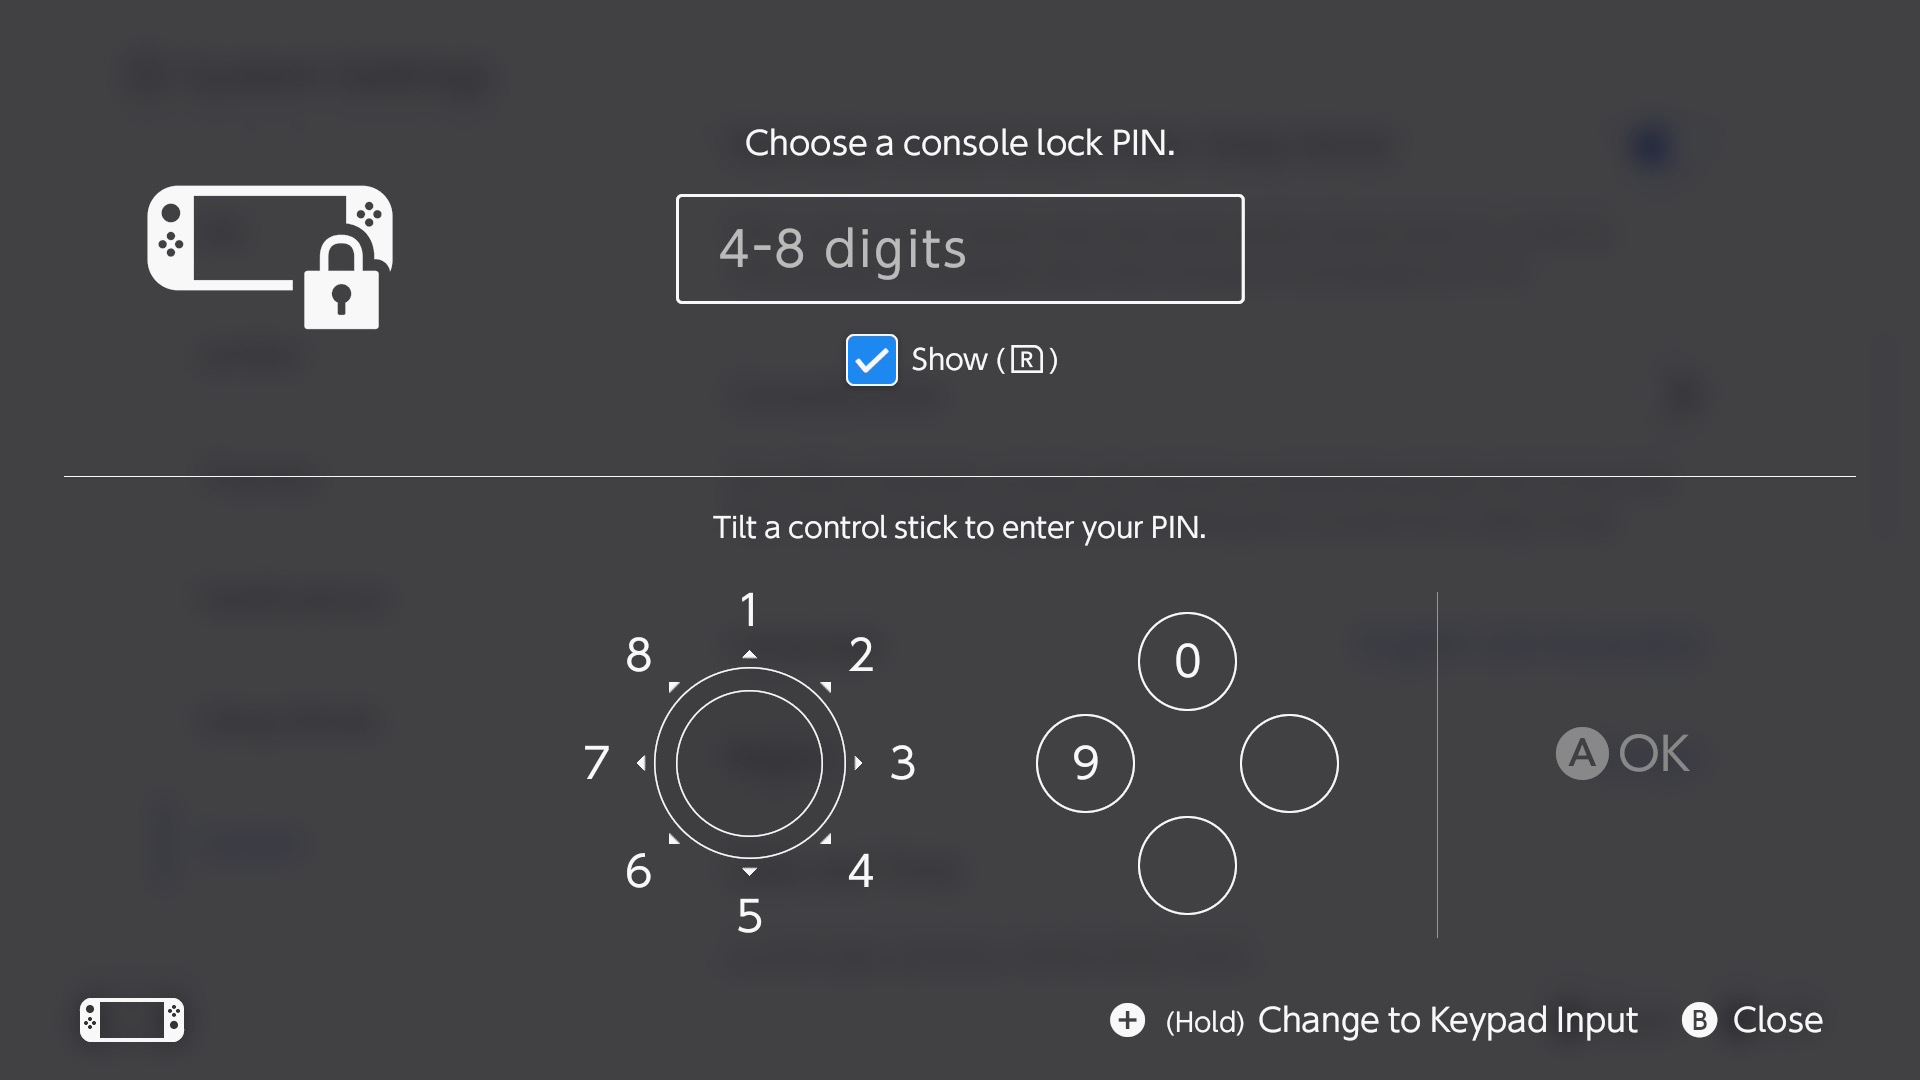
Relying on who else will likely be utilizing your Swap, it’s possible you’ll wish to change your Lock Display settings with the system lock menu.
Head to Settings > Person, the place you possibly can choose to Skip Choice Display in the event you’re the one one utilizing the console recurrently. Alertanitlvey, head to Settings > System > Console Lock. Right here, you possibly can set a PIN to maintain prying eyes and grubby fingers off your new console, however it’s also possible to decide so as to add parental controls utilizing the devoted Nintendo Swap Parental Controls app.
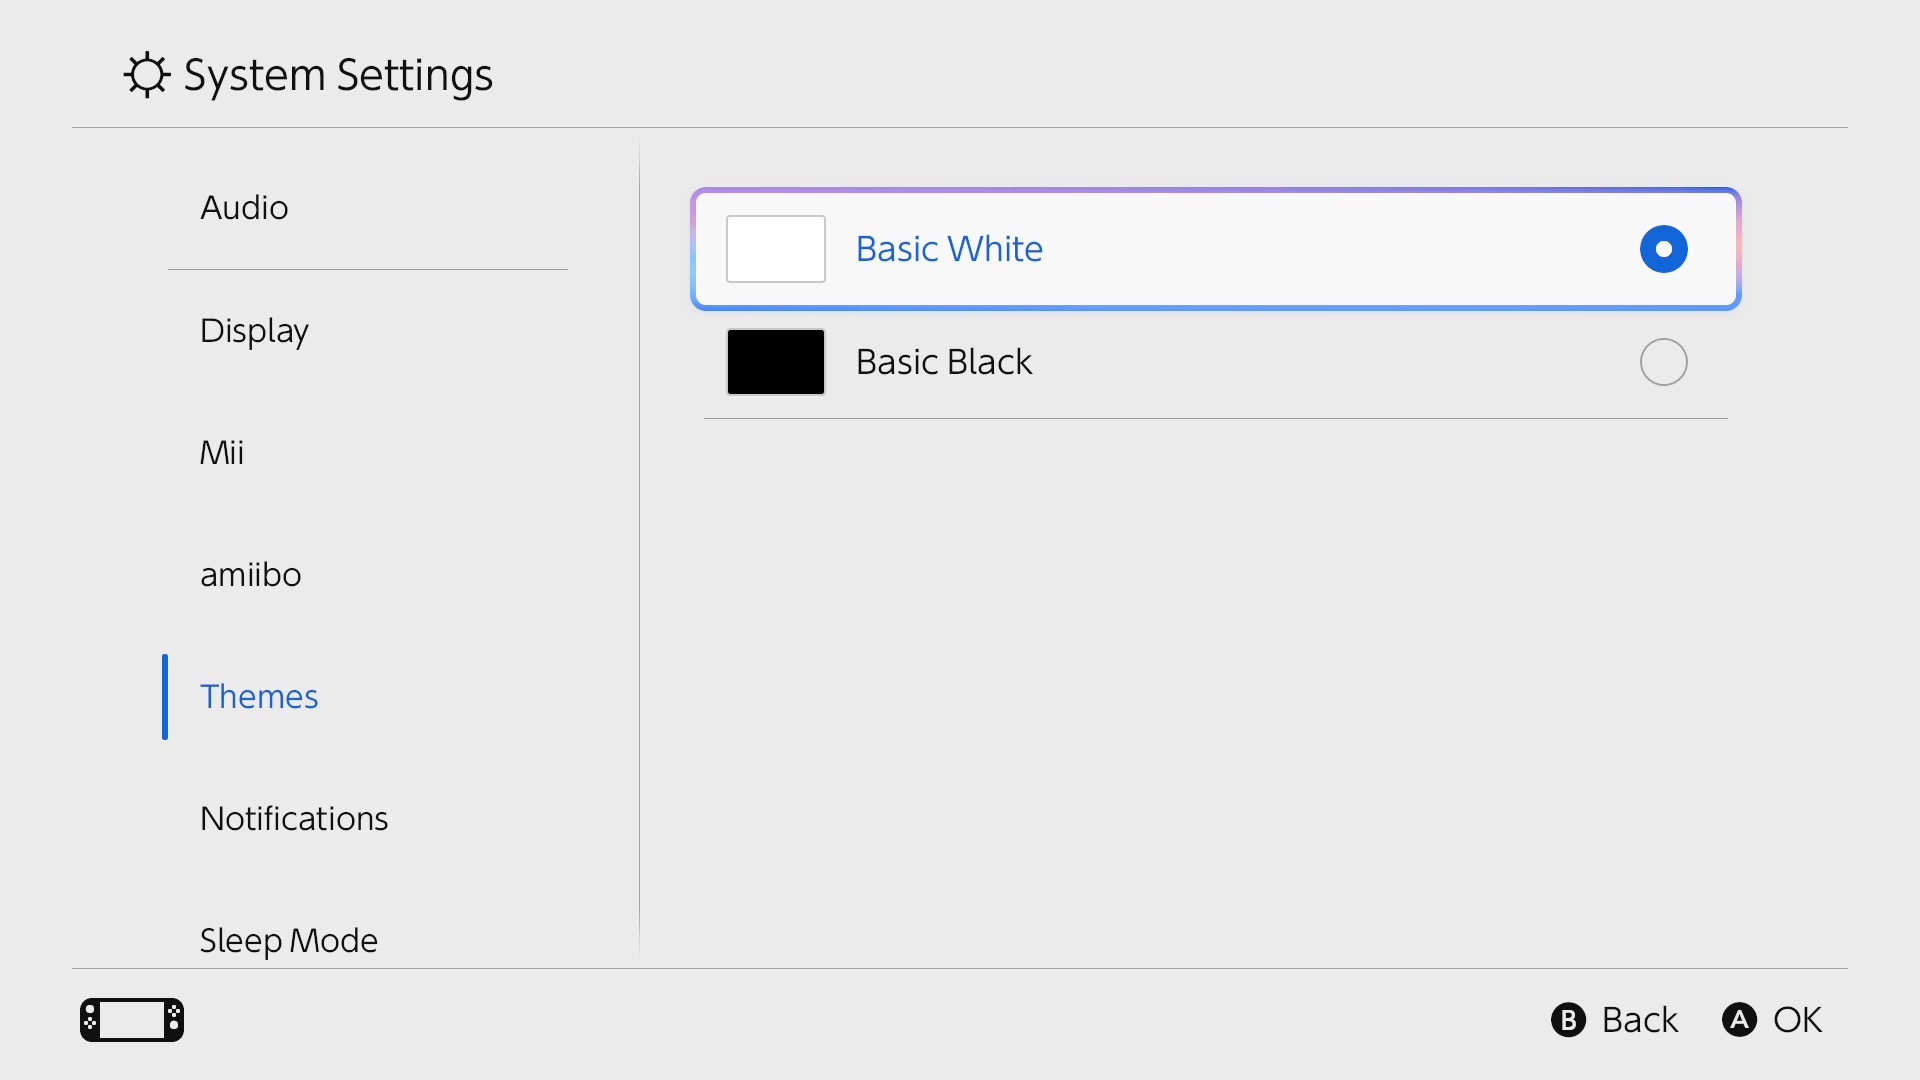
5. Activate Darkish Mode
Positive, this one is a preference-based tip, however personally, I don’t see why you’d choose to make use of the usual white theme over darkish. Particularly in the event you play principally in handheld, it’s an effective way to preserve energy and provides your eyes some relaxation.
As soon as once more, navigate to Settings > Themes and choose between Fundamental White and Fundamental Black.